How to Set Up Secure DNS Servers on Any Operating System
Protect Your Online Privacy with Newshosting’s Secure DNS
Secure and fast Internet browsing with Newshosting’s advanced DNS servers.
30 Day Money Back Guarantee

Available for:

Rated #1 by
Secure DNS Servers Protect Your Browsing
Every time you enter a website address into your browser, a crucial process occurs in the background: your device reaches out to a DNS (Domain Name System) server to convert that website name into an IP address. This process enables you to connect to websites, but not all DNS servers are created equal. Many standard DNS requests are unencrypted, leaving them vulnerable to interception by cybercriminals.
That’s why Newshosting provides the best DNS servers fortified with state-of-the-art encryption to keep your online activity secure. Our DNS servers ensure that your data remains private, providing a shield against online threats like phishing attacks and malware, whether you’re gaming, shopping, or browsing.
Why Choose Newshosting’s DNS Servers?
Choosing the right DNS server is crucial for both your online safety and performance. Newshosting’s DNS servers are engineered to deliver a comprehensive solution that goes beyond basic functionality:
Enhanced Security Measures: Newshosting’s DNS servers filter out harmful websites so your connection stays secure, preventing potential security breaches before they can happen—especially vital for activities like online gaming.
Complete Anonymity: Unlike many DNS providers, Newshosting operates under a strict policy that keeps your browsing history private, allowing you to explore the Web with absolute confidence.
Optimized for Speed: Our DNS servers are designed for speed, with strategically placed nodes around the world. This setup guarantees low-latency connections and high-speed access, making your online activities smoother and more efficient, whether you’re browsing, shopping, or gaming.

How to Set Up Newshosting’s Secure DNS Servers
Setting up secure DNS servers can enhance your privacy and security while browsing. Here’s how to configure secure DNS settings using Newshosting’s DNS servers as an example. Newshosting typically uses the following DNS addresses:
Here’s how you can do it on each operating system.
NOTE: In order to use these, you have to activate them in your VPN admin panel.
-
Open Settings:
Click on the Start menu and select Settings (gear icon).
-
Network & Internet:
Click on Network & Internet on the left sidebar.

-
Change Adapter Options:
Scroll down and select Advanced network settings.

Under More Settings, click on Hardware Properties.
-
Select Your Network:
Click on your active network connection (Wi-Fi or Ethernet).
-
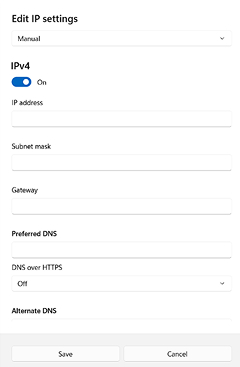
Edit DNS Settings:
Scroll down to DNS server assignment and click Edit.

Change the setting from Automatic to Manual.

Turn on IPv4, and enter the Newshosting DNS servers.
-
Save Changes:
Click Save to apply the settings.
-
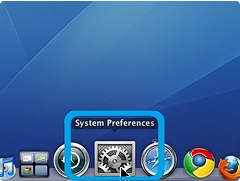
Open System Preferences:
Click on the Apple menu and select System Preferences.
-
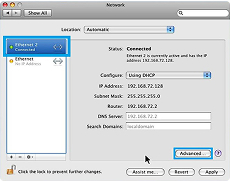
Network:
Select Network.

-
Select Your Network:
Choose your active connection (Wi-Fi or Ethernet) from the left sidebar.
-
Advanced Settings:
Click on the Advanced button.
-
Configure DNS:
Go to the DNS tab.
Click the + button to add Newshosting DNS servers.
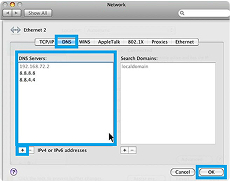
Click OK, then Apply to save changes.
-
Open Settings:
Go to Settings > Network & internet
-
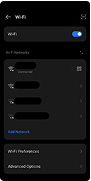
Wi-Fi:
Tap on Wi-Fi, then select your connected network.
-
Modify Network:
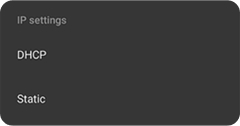
Tap Advanced options.

Change IP settings to Static.
Enter DNS servers in the DNS 1 and DNS 2 fields:
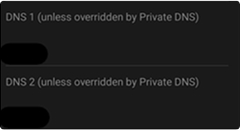
Tap Save.
-
Open Settings:
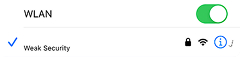
Go to Settings > Wi-Fi
-
Select Network:
Tap the info icon (ℹ️) next to your connected network.
-
Configure DNS:
Scroll down to DNS and tap Configure DNS.
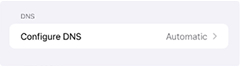
Change to Manual.
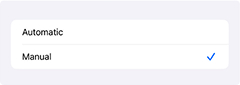
Remove existing entries and Add DNS Servers:

Tap Save.
-
Open Settings:
Click on the system menu and select Settings.
-
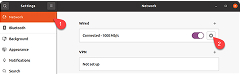
Network:
In the left sidebar, click on Network.
-
Select Your Connection:
Click on the gear icon (⚙️) next to your active connection (Wi-Fi or Ethernet).
-
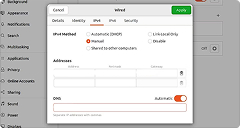
Configure IPv4:
Go to the IPv4 tab.
Change the to Automatic (DHCP) addresses only or Manual.
In the DNS field, enter the Newshosting DNS servers.
-
Save Changes:
Click Apply to save your settings.
You may need to reconnect to your network for changes to take effect.
Additional Tips
- Finding Newshosting DNS Servers: Ensure you have the correct DNS server addresses from your Newshosting account or the support documentation.
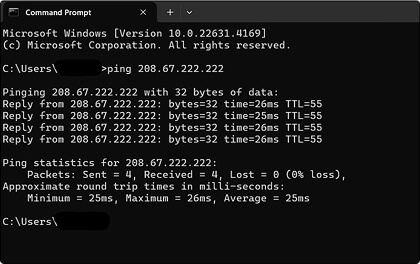
- Testing Configuration: Use commands like nslookup or ping in your terminal or command prompt to verify your DNS settings are working properly.
If you have any specific questions or run into issues, feel free to ask!
Full Security Suite with Newshosting
When you choose Newshosting, you’re not just getting access to the best DNS servers—you’re unlocking a complete security suite designed to protect every aspect of your digital life. Our services include:
Ad Blocker
Eliminate intrusive ads and enhance your browsing speed.
VPN (Virtual Private Network)
Secure your Internet connection with encrypted tunnels.
Threat Protection
Stay ahead of emerging cyber threats with real-time monitoring.
Strongest Encryption Protocols
Safeguard your data with the most advanced encryption available.
Upgrade to Newshosting’s secure DNS servers and discover the ultimate in Internet security.
Need Help? We're Here for You!
If you have any questions about setting up Newshosting’s secure DNS servers or need further assistance, our dedicated support team is ready to assist you. Whether you're troubleshooting an issue or looking for guidance, don’t hesitate to reach out. Contact us anytime to ensure you’re getting the most from your Newshosting experience.